Learn How To Build Robots!
Learn how to build & program sensor powered robots with the Arduino microcontroller board. Engineer the body design of your robots and connect different sensors so they can be programmed to detect motion, distance, light and move/react a certain way based on the input/output of the sensors.
We will create line following bots to more advanced sumo bots & battle bots that you can compete with.
Take a peek at some of what you will learn…
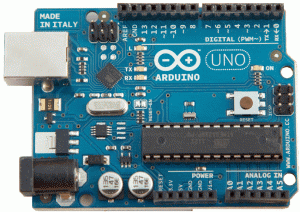
Arduino Board

The Arduino will be the brains of our robots. Learn how to hook up motors, sensors and other parts to it as well as how to program the Arduino to communicate with your sensors and motors.
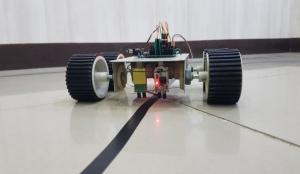
Line Following Bot

Learn how to create and program a line following bot using infrared sensors to automatically follow the line path. You will code your line following bot using the C++ programming language.
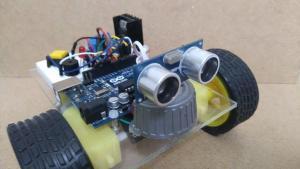
Obstacle Avoidance Bot

Create an object avoidance bot using ultrasonic sensors. Program your bot to detect objects in its path and automatically navigate to avoid those objects. We will create challenging obstacle courses to test your bots.
Sumo Bot

Your Sumo Bot will leverage multiple sensors, motors and other parts. You will be given a set of rules and will need to come up with a design that gives your bot the best chance to win.
Have Questions? Contact Us Below
Trivium Robotics Club
Below is the code & wiring diagrams for the battle bots that were created in the Trivium robotics club. If you have any trouble or have any questions, feel free to email me at misty@codedigs.com or text me at 805-441-9472. I don’t answer my phone but if you text me, I will call you back and walk you through anything you need help with.
BTW – your bots went viral!!!
- They were featured on the Arduino hubs main page for over a week
- They were covered on hackaday
- They were featured on the front page of Hacker News for 14 hours (it is hard to get on the front page of HN).
- They made it to the top of the robotics subreddit, the battlebots subreddit, the edtech subreddit and the CSEducation subreddit.
People were so impressed with the designs you came up with. My email was flooded with people asking questions about your bots. All of you exceeded my expectations with this club. Thank you so much for doing this with Nate and I. We had a blast!!!
Arduino Sketches
- PS2 Controller Code – use to control the bot with the PS2 controller
- Line Tracking Code – load this on the bot if you want to put it in line following mode
- IR Remote Controller Code – this is to control the bot with the IR controller but I suggest just using the PS2 controller 😉
To load the code on the bot:
- Setup an account on Arduino and use the web code editor at https://create.arduino.cc/editor
- Log into Arduino, then go to the Arduino sketch above that you want to load onto your bot and click “Add To My Sketchbook”. This will load the code into your Arduino account as a “Sketchbook” for use.
- With your bot turned off, plug the blue cable into the computer and your bot and then click the “Upload and Save” right arrow while in the Sketchbook you want to load.
Note: If you are using a Chromebook, you will need to install the Chromebook extension here in order to use the Arduino Create.
Wiring Diagrams
Diagram showing how to connect the 2 motors to the motor board and also how to connect the motor board up to the shield.

Diagram showing how to connect the PS2 controller up the the sensor shield

Diagram showing how to connect an extra motor to a breadboard for a spinner like what was made on Boone’s bot.

CodeDigs.com is a division of Go Smart Solutions, LLC. Copyright ©2015 - 2025 Go Smart Solutions, LLC. All Rights Reserved
